11 Plyometric Exercises to Include In Your Next Workout
When you’re in need of a quick, effective workout, mix these trainer-approved, high-intensity plyometric exercises into your training session.

When you think of “plyometrics,” explosive squat jumps, lightning-fast high knees, and powerful burpees are likely the first to pop into your mind. But those well-known moves are just the tip of the iceberg when it comes to plyometric exercises, which, FTR, can be valuable additions to anyone’s workout routine.
To help you spice up your workouts when those well-known moves begin to feel stale, Shape tapped Bianca Vesco, a NASM-certified personal trainer and fitness instructor in Nashville, to break down and demonstrate nearly a dozen of the best plyometric exercises that will make you feel like the collegiate athlete of your fitness dreams. Plus, Vesco gives the summarized version of what plyometric exercises entail, their key benefits, and how to safely and effectively add these heart-pumping moves to your fitness routine.
Read More: Your Guide to Plyometrics
Plyometric Exercises, Explained
In case you’re unfamiliar with the unique workout style, here’s a recap: Plyometric exercises are moves that call on your muscles to produce the maximum amount of force in a very short interval of time, says Vesco. Research shows that in order to create as much force as possible, you’ll utilize the stretch-shortening cycle. In this combination of eccentric and concentric contractions, your muscles are lengthened to build up potential energy (the eccentric phase), then rapidly shortened to release this energy (the concentric phase).
The primary goal? To increase power, train your cardiovascular system, and improve athletic performance, says Vesco. But plyometric exercises can even be beneficial for non-athletes looking for a short, yet effective workout, she adds. “You can work a lot harder — exert more energy and more power — in a lot less time, which I’m a very big fan of,” she says.
Typically, plyometric exercises involve jumping (which is why the workout style is also called “jump training”), leaping, bounding, or changing directions quickly, so it’s no surprise the moves are both high-intensity and high-impact, says Vesco. They’re also primarily focused on and powered by your lower body, she says. “Your legs are the biggest muscle group in your body, and you use them to literally carry around your entire life,” she explains. “But it’s really hard to add explosiveness with your upper body. We’re a little bit disproportioned in that sense.” Just compare a jump squat to a plyometric push-up. Lowering down into a squat, pressing into your heels, then explosively springing upward, for example, is generally much easier than lowering into a push-up, driving into your palms, and powerfully pressing up so your hands briefly lift off the floor, says Vesco. Even explosive, strength-building upper-body exercises such as thrusters and dumbbell snatches still call on the power generated from your legs to help create some momentum, she explains.
Regardless of the exact move, plyometric exercises are usually performed using only your body weight, as adding more load doesn’t have any functional (re: everyday movement) benefit, even if you’re an athlete. In fact, adding resistance may increase the risk of injury, says Vesco. “I would advise against it,” she cautions. “If you’re doing a weighted box jump, for example, when are you going to be jumping onto something while also holding a weight? I can’t think of a situation where you would need to do that in real life.”
How to Incorporate Plyometric Exercises Into Your Routine
Given their high-impact, high-intensity nature, plyometric exercises shouldn’t be added into your fitness regimen willy-nilly. Instead, you’ll want to study up (and actually use) these tips to ensure you stay injury-free and get in an effective workout.
Test Your Fitness Level First
Before you add Kriss Kross’ song “Jump” to your playlist, you first need to practice a few basic plyometric exercises. Try performing a few rounds of high knees, jumping jacks, and skaters to see if your joints are ready for the high-impact, high-intensity moves, suggests Vesco. “Ask yourself, ‘Do my feet, ankles, knees, and joints feel okay?'” she says. “The biggest thing about plyometrics is that they are high impact, which leaves a lot of room for injury if your body is not ready to do that yet.”
While some discomfort is to be expected when you’re taking on a tough set of plyometrics, pain is a different story. Press pause if you feel sharp pain anywhere, especially around your joints, or if you’re feeling short of breath even after rest breaks. On the other hand, if your muscles merely feel a little tight, that might be a signal to add some simple warm-up exercises to your plyometrics routine.
Then, if you feel comfortable with those moves, you may be ready to mix plyometric exercises into your workout routine. Not sure? Reach out to a certified fitness trainer to help determine where you should start.
Focus On Control First
When you first begin playing with plyometric exercises, let speed and power take the backseat until you’ve learned how to control your body during these high-impact movements, says Vesco. Doing so will help you perfect your form and reduce your risk of injury.
Place Plyometric Exercises Strategically Throughout Your Workout
Exactly when you should add plyometric exercises to your regular workout all depends on your fitness goals, says Vesco. If you’re dead set on gaining strength and lifting increasingly heavy objects, you’ll want to save your favorite plyometric exercises for a “burnout” at the end of your training session, she says. Place them at the top of your workout, and you’ll use up all your energy on moves that aren’t necessarily helping you meet your fitness goals, she points out.
On the other hand, if you’re focused on increasing your stamina, you’ve got the green light to start your workouts with plyo. “If the goal is athletic performance and cardiovascular health, you would put the plyometric exercises at the top of the workout when you have the most energy to do them,” says Vesco. Or, on days in which you just want a sweaty, high-intensity workout, consider incorporating them into your HIIT or Tabata sessions, she adds.
Choose Between Rep- or Time-Based Sets
Not sure if you should perform your plyometric exercises for time or reps? There isn’t one “best” way to structure your sets, so choose a style that feels right for your body, says Vesco. For example, you could do eight to 10 reps of a single-leg deadlift, then 30 seconds of a single-leg hop, a plyometric exercise that complements the strength-building move, she says. Or, you could do 30 seconds to a minute of those deadlifts, followed by 12 hops. “There’s no concrete, right or wrong way to do it — only the way that works for you,” she says.
Don’t Overlook Your Feet
Surprise: Your feet play a key role in keeping you safe and sound during plyometric exercises. “When you jump, I think the landing is where there’s most room for error, so you have to be incredibly mindful of landing on your entire foot — all four corners,” says Vesco. “Your stability is going to come from theinner and outside of the ankles, knees, and hips. And you turn on your adductors and abductors [muscles that keep your lower body stable] by really focusing on pressing all four corners of your foot.” Choosing the proper footwear can also help keep your joints safe and stable. Opt for a shoe that’s designed for HIIT or jump training and has ankle support to keep it stable while you move from side to side, suggests Vesco.
Keep Your Head In the Game
While it’s easy to zone out from your workout and get deep in thought about what you’re having for lunch later, Vesco cautions against performing plyometric exercises mindlessly. “One of the biggest injuries I see with plyometrics is people jumping too high too quickly, jumping when they’re tired, or jumping when they’re not paying attention and scraping their shins,” she says. “You have to be so in tune with every single minute of your exercise, especially if it’s something like box jumps or even burpees…You have to move with as much intention as possible and really take stock head to toe of what your body’s doing.” So, consider your plyometric exercises an opportunity to incorporate a little bit of mindfulness into your workout.
11 Plyometric Exercises to Try
Ready to give plyometric exercises a shot? To help you kick off your jumping journey, Vesco shared and demonstrated her favorite plyometric exercises, which can be modified to meet you where you’re at in your fitness journey. Opt for smaller hops or remove the jumps entirely if you want to tone down the impact or simply work on your form first, she suggests. Or, you can slow down the moves so the workout is a bit easier on the cardio front, she adds. Conversely, you can add a plyometric box to your jump routine for more of a challenge.
180 Turns
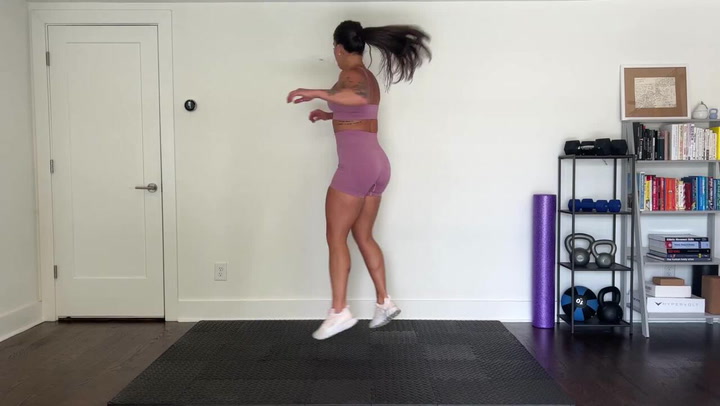
A. Stand with feet shoulder-width apart, arms at sides, and core engaged.
B. Sit back into hips and bend knees a few inches to lower body into a slight squat, then drive into feet and explosively turn 180 degrees to the right to face the other direction.
C. Upon landing, immediately drive back into feet and explosively turn 180 degrees to the left to return to the starting position. Continue alternating sides, returning to starting position in between each rep.
Broad Jump
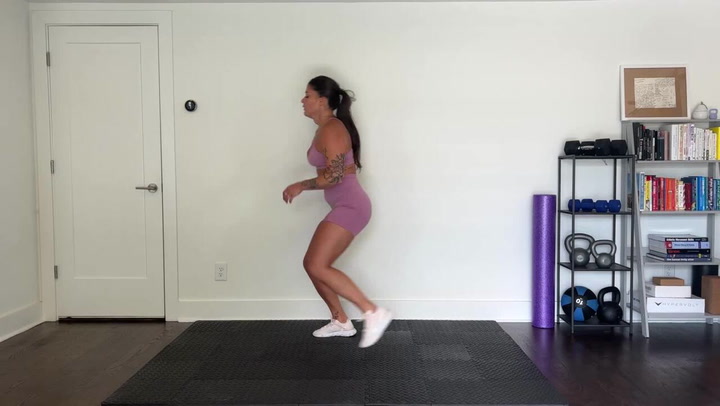
A. Stand with feet hips-width apart, knees slightly bent, and arms at sides. Engage core.
B. Quickly swing arms backward while bending knees even more, then explosively jump forward while swinging arms forward.
C. Land softly with bent knees and arms extended in front of chest. Lower arms back to sides and quickly backpedal to starting position.
Burpee
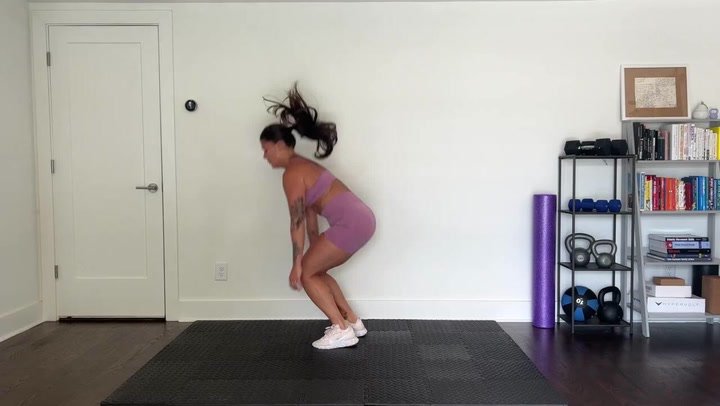
A. Stand with feet shoulder-width apart, arms at sides, and core engaged.
B. Sit back into hips and bend knees to lower body into a squat.
C. Place hands on the floor directly in front of and just inside feet. Shift weight onto hands.
D. Jump feet back to softly land on balls of feet in a plank position; at the same time, lower chest down to the floor, such as what you’d do at the bottom of a push-up. Body should form a straight line from head to heels.
E. Push through hands to lift the body off the floor and return to plank position, then jump feet forward so they land just behind hands.
F. Reach arms overhead or swing them back behind body and explosively jump into the air. Land and immediately lower back into a squat for the next rep.
High Knees
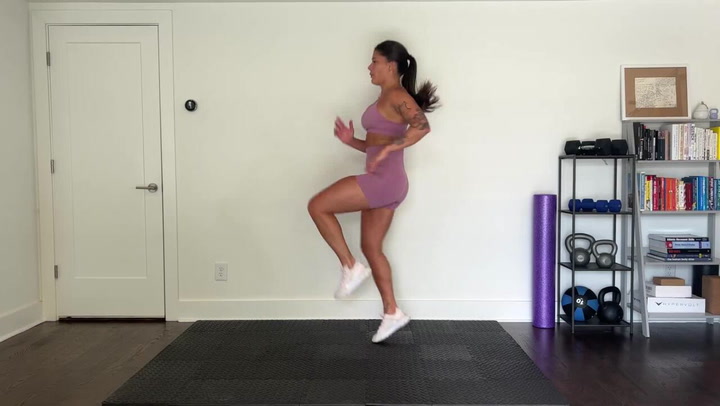
A. Stand with feet hips-width apart, arms at sides, and core engaged.
B. Explosively drive right knee toward chest and pump left arm up.
C. Switch, driving left knee toward chest and right arm up.
D. Continue alternating quickly, pumping opposite arm with each leg.
Jump Squat
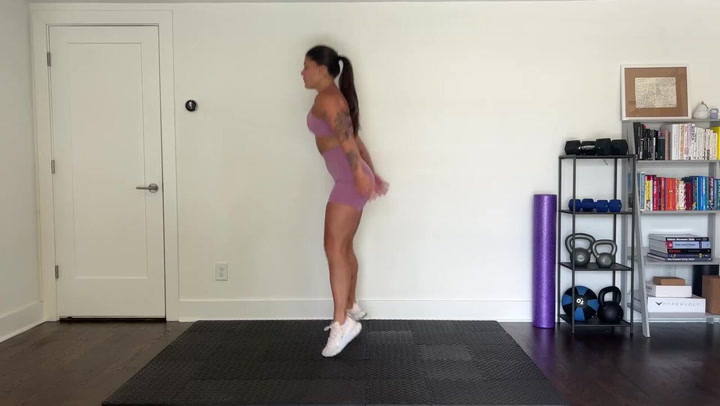
A. Stand with feet shoulder-width apart, hands clasped in front of chest. Sit back into hips and bend knees to lower body into a squat.
B. Explosively push upward and swing arms back behind body, jumping as high as possible. Make sure to drive through heels and not toes. Land softly with knees bent and immediately squat down, bringing hands back in front of chest.
Lunge Squat Lunge
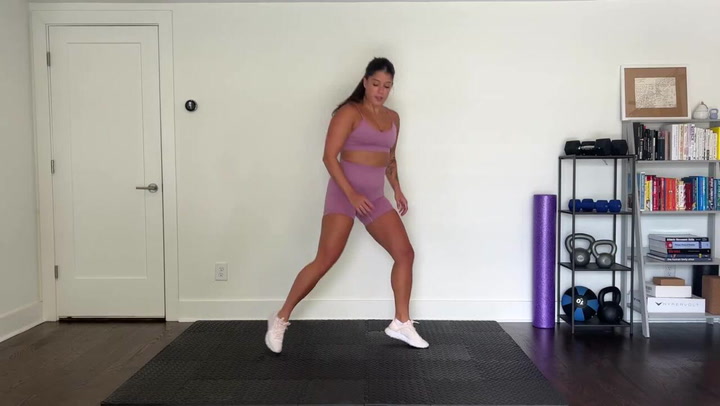
A. Stand with feet wider than shoulder-width apart, toes turned slightly outward and hands clasped in front of chest.
B. Sit back into hips and bend knees to lower until thighs are parallel or almost parallel with floor, keeping chest up and preventing back from rounding.
C. Quickly press through feet to straighten legs and hop into the air, simultaneously turning body to the right. Upon landing with right foot in front and left foot extended behind body, immediately lower into a lunge. Lower down until right thigh is parallel to the floor and both knees form 90-degree angles.
D. Push through middle of right foot to rise out of the lunge, simultaneously turning body back to center.
E. Do one squat, then repeat the lunge on left side. Continue, alternating which leg does the lunge each time.
Single-Leg Hop
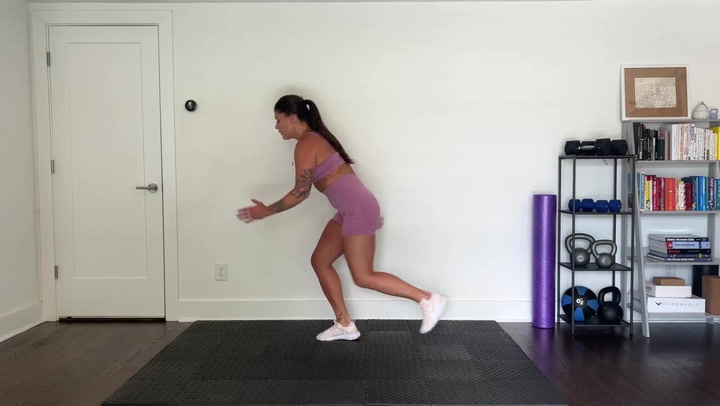
A. Stand in a split stance with right foot forward, knee slightly bent, and left leg fully extended behind body, toes resting on floor. Bring left hand up to ear and fully extend right arm behind body. This is the starting position.
B. Quickly drive left leg up to chest, extend left arm behind body, and bring right hand up to ear. Immediately press into right foot and hop into the air. Land softly on right foot and return left leg back to starting position for the next rep.
Skaters
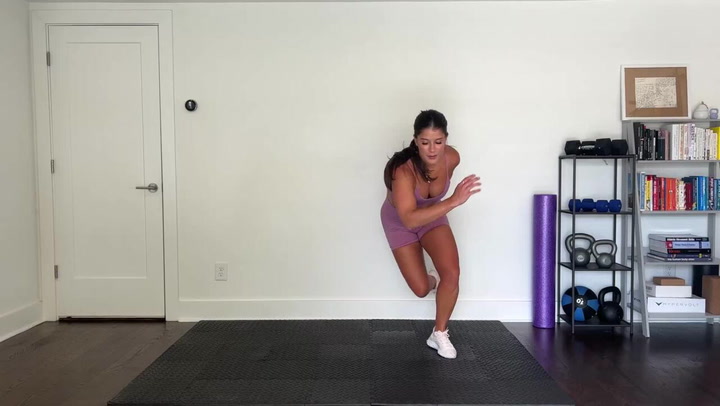
A. Stand with feet shoulder-width apart, knees slightly bent and elbows bent, and hands in front of chest.
B. Jump laterally to right and balance on right leg as left leg crosses behind right, making sure to keep left toes off the floor.
C. Quickly jump laterally to the left and balance on left leg as right leg crosses behind left, making sure to keep right toes off the floor. Repeat, alternating sides.
Split Jump
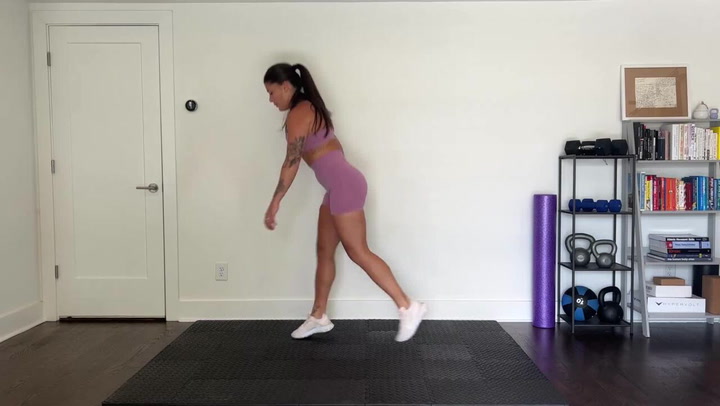
A. Stand with feet hips-width apart and arms at sides
B. Keeping core engaged, chest tall, and shoulders stacked over hips, take a large step forward with right foot. Lower down until right thigh is parallel to the floor and both knees form 90-degree angles. This is the starting position.
C. Lower down 1 to 2 inches to gain momentum, then push through feet and jump toward the ceiling. In the air, quickly switch feet so left foot is in front. Land softly and repeat, alternating sides.
Star Jump
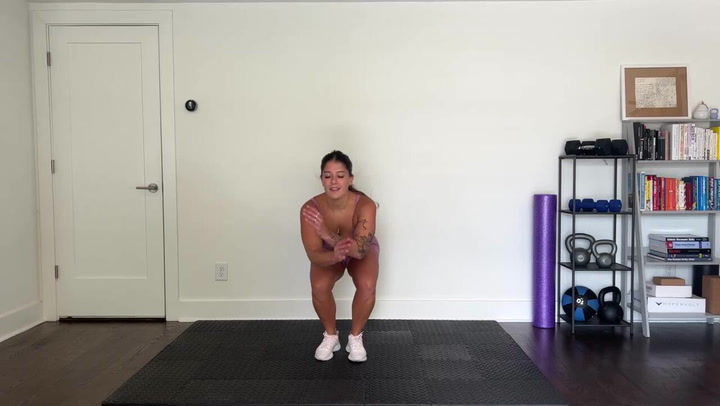
A. Stand with feet hips-width apart and arms at sides.
B. Slightly bend knees, then jump toward the ceiling, simultaneously spreading legs out to the side and lifting arms out to the side and overhead.
C. Quickly reverse the movement of legs and arms and land softly.
Tuck Jump
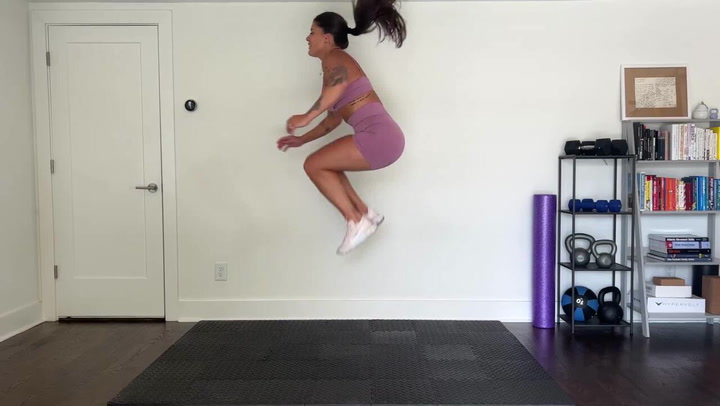
A. Stand with feet slightly wider than hips-width apart, toes turned slightly outward and hands clasped in front of chest.
B. On an inhale, sit back into hips and bend knees to lower until thighs are parallel or almost parallel with floor, keeping chest up and preventing back from rounding.
C. On an exhale, explosively press through feet and jump as high as possible, swinging arms and tucking knees toward chest.
D. Land softly and quickly lower into a squat for the next rep.